
UV printers can print directly on many metal products, including coated aluminum panels, anodized aluminum, stainless steel, tinplate, painted metal and powder-coated parts. The process can reproduce full-color graphics, opaque white details, clear varnish and raised textures without using screens or transfer paper.
The difficult part is rarely getting an image to appear. It is making sure the cured ink remains attached after the product is handled, scratched, cleaned, bent or exposed to its intended environment.
Metal is non-absorbent, so UV ink remains on the surface rather than soaking into the material. Its performance therefore depends heavily on what is actually present on that surface: oil, oxidation, paint, powder coating, anodizing, protective film, polishing compound or a factory-applied finish.
For that reason, two aluminum sheets may require different preparation even when they look almost identical. A reliable metal-printing workflow begins with identifying the surface, cleaning it correctly, testing whether primer is required and approving the finished print under realistic use conditions.
What Is UV Printing on Metal?
UV printing on metal is a direct digital printing process that deposits UV-curable color, white and clear inks onto a metal surface and cures those inks with ultraviolet light immediately after printing.
The printhead moves above the metal product and places fine droplets according to the digital artwork. UV-LED lamps mounted near the print carriage expose the ink as it is printed, converting the liquid layer into a cured image. UV-curable ink is used on non-absorbent materials such as metal, glass and plastic because it does not depend on the substrate absorbing the colorant.
A typical ink configuration may include:
- CMYK for full-color graphics
- White ink for dark or colored metal
- Clear varnish for gloss and tactile effects
- Primer or adhesion promoter for difficult surfaces
- Light colors on selected machines for smoother gradients
Unlike screen printing, direct UV printing does not require a separate screen for every color. Unlike laser engraving, it can reproduce photographs, gradients and complex brand colors. The artwork can also change from one product to the next, which is useful for personalized nameplates, serialized panels and short production runs.
UV curing makes the print ready for handling quickly, but “cured” and “well bonded” are not the same thing. Ink can be fully cured and still peel from an incompatible or contaminated metal surface. Mimaki’s technical guidance notes that adhesion is strongly affected by surface type and pretreatment, and recommends primer or surface modification for some metals.

Which Metal Types Can Be UV Printed?
The metal alloy matters, but the surface treatment often matters more. Ink does not interact with the internal composition of a thick metal plate; it interacts with the outermost layer.
A UV printer may therefore be printing onto anodizing, paint, powder coating or lacquer rather than directly onto bare metal.
| Metal or surface type | General suitability | Main concern | Common applications |
| Coated aluminum | High after testing | Compatibility of the coating | Signs, photo panels and equipment labels |
| Anodized aluminum | Medium to high | Anodized finish varies by supplier | Nameplates, control panels and metal cards |
| Bare aluminum | Variable | Oxidation, polishing residue and low adhesion | Industrial plates and fabricated components |
| Stainless steel | Variable | Smooth non-porous surface and processing oil | Tags, panels, kitchen products and enclosures |
| Powder-coated metal | High when coating is compatible | Texture and coating chemistry | Appliance panels and equipment housings |
| Painted steel | Variable | Adhesion to the paint rather than the steel | Signs, cabinets and decorative panels |
| Tinplate | Medium to high | Protective lacquer or oil residue | Promotional tins and packaging |
| Brass and copper | Test required | Oxidation and surface polish | Plaques, decorative items and awards |
| Brushed metal | Medium | Grooves affect fine detail and varnish | Signage and premium decorative products |
Coated aluminum
Coated aluminum is often one of the more practical materials for UV printing because the factory-applied coating can provide a more consistent surface than raw polished metal. However, not every coating is designed to accept UV ink.
A sample should still be tested for scratching and tape pull. Some panels are manufactured specifically for sublimation, painting or architectural use, and their coatings may behave differently under UV ink.
Anodized aluminum
Anodized aluminum is widely used for nameplates, equipment panels, metal cards and industrial labels. Its hard surface can produce sharp graphics, but anodized finishes differ in pore structure, sealing and surface chemistry.
Do not approve an entire category based on one successful anodized sample. Test the exact grade and supplier used in production.
Stainless steel
Stainless steel may carry fingerprints, cutting fluid, polishing compounds or protective oil even when the surface appears clean. These residues can prevent the ink or primer from forming a reliable bond.
A brushed stainless finish may also influence small lettering. Fine grooves can break up thin lines, while clear varnish may exaggerate the texture.
Powder-coated and painted metal
On coated steel or aluminum, the ink is bonding to the paint or powder coating. A well-bonded factory coating does not automatically guarantee that UV ink will adhere to it.
Gloss level, additives, silicone contamination and coating age can all influence performance. A test on the finished coated component is more useful than testing a piece of uncoated metal from the same alloy.
Bare and polished metal
Raw metal is often the most demanding category. Smooth polished surfaces offer little mechanical texture, while oxidation or handling residue creates inconsistency.
Technical guidance from UV printer manufacturers recommends considering primer or surface treatment for cast, extruded and inorganic metals such as aluminum and stainless steel when direct adhesion is insufficient.
How to UV Print on Metal Step by Step
A professional workflow treats material qualification as part of the job, not as an emergency step after ink begins peeling.
1. Identify the metal and its finish
Ask the material supplier or customer for as much information as possible:
- Metal type or alloy
- Bare, painted, anodized or powder-coated surface
- Protective lacquer or clear coat
- Polishing or brushing process
- Presence of removable protective film
- Final use of the product
- Expected contact with water, cleaners, alcohol or abrasion
The answer determines how the sample should be cleaned, printed and tested.
2. Remove protective film and inspect the surface
Some sheet metal arrives with a clear protective layer that is difficult to see near the edges. Printing on this film may look acceptable at first, but the entire graphic will disappear when the customer removes it.
After removing the film, inspect the material under angled light for scratches, fingerprints, oil and uneven coating.
3. Clean the metal carefully
Use a cleaning method compatible with both the metal and its surface finish. A lint-free cloth and an approved cleaner are usually safer than an improvised mixture.
Isopropyl alcohol is commonly used to remove light oil and dirt, but it is not suitable for every painted, coated or printed surface. Test it in an inconspicuous area and follow the material supplier’s instructions.
Clean in one direction with a fresh section of cloth rather than repeatedly spreading contamination across the panel. Allow the surface to dry fully and avoid touching the print area afterward.
Cleaning can remove contamination; it cannot change an inherently difficult surface into a high-adhesion surface. When cleaning alone does not produce a satisfactory bond, primer or surface treatment should be evaluated.
4. Decide whether primer is necessary
Prepare at least two samples:
- Cleaned metal without primer
- Cleaned metal with a compatible primer
Where practical, add variations in ink density or curing settings. This creates a simple test matrix rather than relying on a single guess.
Primer acts as an intermediate bonding layer between the metal surface and UV ink. Mimaki describes its metal-compatible primer as a way to improve ink bonding while preserving the material texture, while Roland similarly recommends an adhesion promoter when testing shows significant peeling.
Use only a primer confirmed to be compatible with the ink system and substrate. Too much primer can create visible haze, uneven gloss or loss of fine detail. It should not be treated as a universal liquid that solves every adhesion problem.
5. Secure and level the product
Place the metal item flat on the print bed. Thin sheets may bow, while stamped parts can have raised edges that are not obvious from above.
A vacuum platform can help stabilize sheet metal, but small objects and shaped parts may need a fixture. The fixture should:
- Prevent movement during carriage travel
- Keep repeated products in the same position
- Hold every item at a consistent height
- Leave the print area unobstructed
- Allow the operator to load and unload safely
Measure the highest point of the object and set a safe printhead clearance. Excessive distance can reduce edge sharpness, while insufficient clearance creates a collision risk.
6. Prepare color, white and varnish layers
The artwork should be separated according to the required visual effect.
On white or pale coated metal, CMYK may be printed directly. On dark, black or strongly colored metal, white ink is normally placed beneath the color image to stop the substrate from changing the design.
A production file may use:
- Color only for a translucent effect over metallic silver
- White plus color for opaque brand colors
- White only for text and line graphics
- Color plus varnish for selective gloss
- White, color and varnish for a premium layered finish
- Repeated varnish layers for raised details
Keep registration accurate between the special-color layers. Even a small shift can create a visible white outline around letters or logos.
7. Print a controlled sample
Begin with a representative section containing:
- Fine text
- Solid color
- A photograph or gradient
- White underbase
- Varnish
- An area close to an edge or hole
This reveals problems that a simple color block may hide.
Do not immediately increase UV lamp intensity when adhesion is poor. Curing, ink thickness, surface contamination and primer compatibility must be considered together. Excessively aggressive curing can create a hard, brittle layer without improving the bond underneath.
8. Test adhesion and durability
A basic shop-floor adhesion check may include light scratching, firm rubbing and a scored tape-pull sample. Roland’s UV adhesion guidance recommends examining whether ink lifts beyond the scored areas and considering an adhesion promoter if a large amount peels away.
For products exposed to demanding conditions, add tests that reproduce actual use:
- Repeated handling
- Cleaning with the intended detergent
- Contact with alcohol or solvent where applicable
- Water exposure
- Outdoor exposure
- Bending or forming
- Edge cutting
- Assembly into a finished product
A simple internal tape test is useful for screening, but it should not be presented as a certified laboratory test unless the correct standard, equipment and procedure have been followed.
White Ink, Varnish and Raised Effects on Metal
Metal is particularly suited to designs that combine the printed image with the visible substrate.
White underbase for accurate color
CMYK UV inks are translucent. Printed directly onto black metal, they can appear dark and muted. Printed over silver metal, they may take on a metallic character.
A white underbase makes the colors more opaque and closer to their intended appearance. White does not always need to cover the entire design. Selective white can be used beneath a product image while leaving decorative areas transparent so the brushed or silver surface remains visible.
This technique creates a metallic-looking effect without using metallic ink.
Clear varnish
Varnish can highlight logos, borders, patterns and text. It may be used to create contrast between matte metal and glossy printed areas or to add a tactile finish to a flat image.
Gloss ink systems are also used for textures and dimensional effects, while high-opacity white supports strong color on dark materials.
Clear varnish should not automatically be described as a protective topcoat. Its durability depends on the ink formulation, thickness, curing and end use. For products exposed to heavy abrasion or chemicals, a separate industrial coating may still be necessary.
Raised and embossed effects
Multiple layers of white or varnish can create raised lettering, simulated embossing and textured patterns. This is useful for:
- Brand marks
- Decorative plaques
- Premium packaging tins
- Award panels
- Tactile labels
- Prototype control interfaces
Raised layers should be kept away from areas that will be bent, punched, riveted or tightly assembled. Printing is generally more predictable after major cutting and forming operations have been completed.
Common Applications of UV Printing on Metal
UV printing is strongest where a business needs color, personalization or short production runs.
Metal signs and plaques
Full-color signs can combine photographs, text, white ink and clear accents. Applications range from interior directional signs to branded plaques and decorative wall products.
Outdoor signs require more than a visually successful sample. Ink, primer, metal coating and environmental exposure must be evaluated as a system.
Equipment control panels
UV printing can reproduce labels, warning symbols, scales, icons and color-coded operating zones on control panels. Variable data allows serial numbers or model-specific markings to change without replacing a screen.
For heavily used panels, abrasion, cleaning chemicals and button contact areas should be included in approval testing.
Metal nameplates and identification tags
Short runs of nameplates can contain individual names, QR codes, serial numbers or product information. A positioning fixture helps maintain alignment when many small plates are printed in one batch.
Promotional tins and metal boxes
Tinplate containers can be decorated with photographs, seasonal graphics or personalized branding. The operator must test the existing lacquer because the print is bonding to that coating rather than directly to the steel.
Metal cards and personalized gifts
Business cards, luggage tags, bookmarks, photo panels and decorative gifts are well suited to compact flatbed printers. White ink is especially useful on black or colored blanks.
Electronic enclosures
Printed graphics can replace separate stickers on some housings and panels. Printing should usually take place after fabrication so that later bending, drilling and cutting do not damage the ink layer.
UV Printing vs Laser Engraving, Screen Printing and Sublimation
The best production method depends on the design, quantity and durability requirement.
| Method | Full-color graphics | White ink | Variable data | Surface result | Best suited to |
| UV printing | Yes | Yes | Excellent | Cured layer on the surface | Custom graphics, short runs and decorated products |
| Laser engraving | Usually limited | No | Excellent | Marked, engraved or ablated surface | Serial numbers, logos and permanent identification |
| Screen printing | Limited by screens and colors | Yes | Limited | Printed surface layer | Repeated medium- or high-volume designs |
| Dye sublimation | Yes | No | Excellent | Image transferred into a compatible coating | Coated aluminum photo panels |
| Vinyl graphics | Yes | White media available | Excellent | Applied film | Large signage and changeable graphics |
UV printing is usually the stronger choice for:
- Full-color artwork
- Photographs
- White ink on dark metal
- Short personalized runs
- Raised varnish effects
- Multiple versions of one product
Laser engraving is usually better when the objective is to permanently mark the metal itself rather than place a colored image on top.
Screen printing remains practical for repeated designs at higher quantities, especially when only a few spot colors are needed.
Sublimation can produce excellent photographic results on specially coated aluminum, but it cannot be applied to ordinary untreated metal in the same way.
Common UV Printing Problems on Metal
| Problem | Likely cause | Recommended check |
| Ink peels during tape testing | Contamination, incompatible finish or no primer | Reclean the surface and compare primed samples |
| Color looks dull on dark metal | CMYK printed without white underbase | Add a white layer beneath the color |
| White border appears around artwork | Misregistration between white and CMYK | Adjust choke, spread and layer alignment |
| Print scratches too easily | Poor adhesion, unsuitable ink or insufficient testing | Review substrate, primer, curing and end-use requirements |
| Varnish looks patchy | Dirty or textured surface | Clean the metal and test varnish coverage |
| Small text looks broken | Brushed texture or excessive print distance | Reduce clearance and test a smoother finish |
| Image is blurred on one side | Panel is warped or not level | Measure the highest point and improve bed contact |
| Ink cracks after forming | Product was bent after printing | Complete forming first or test a more flexible ink system |
| Edges chip after cutting | Cutting occurred through the cured layer | Print after cutting where practical |
| Primer is visible outside artwork | Excessive or poorly masked primer | Apply primer only where required |
The most expensive troubleshooting mistake is changing several variables at once. If cleaning method, primer, ink density and curing are all changed in the same test, the operator cannot tell which adjustment solved the problem.
Record each approved metal, supplier, surface finish and print setting. Over time, this becomes a material library that reduces setup time and prevents repeated failures.
How to Choose the Best UV Printer for Metal
The best UV printer is not simply the largest model. It is the machine whose print area, ink configuration and production workflow match the metal products being sold.
RB-4030 PRO for small metal products
The RainbowDGT RB-4030 PRO offers a 30 × 40 cm printing area and CMYK, white and varnish configurations. RainbowDGT lists metal among its supported materials and positions this A3 model for smaller studios, personalized products and compact production.
It is suited to products such as:
- Metal cards
- Small nameplates
- Tags
- Promotional tins
- Decorative plaques
- Small control labels
- Personalized gifts
A fixture can be used to arrange multiple identical blanks and improve repeatability.

Nano 7 PRO for professional studios
The Nano 7 PRO provides a 45 × 60 cm A2+ printing area and is offered with multiple printhead configurations. RainbowDGT lists metal, wood, PVC, plastic, glass and acrylic among its printable materials.
The larger bed is more practical for:
- Medium-size panels
- Multiple nameplates in one batch
- Sign blanks
- Equipment covers
- Larger decorative products
Although the product page describes direct printing on metal, a commercial buyer should still qualify the exact finish and use primer when testing shows it is necessary. Material compatibility should be approved by sample, not by category name alone.

Nano 9 for larger panels and batch layouts
The Nano 9 has a 60 × 90 cm A1+ printing area and supports white ink, UV varnish and special-effect printing. RainbowDGT positions it for larger-scale customization and industrial production compared with its smaller A3 platform.
It is a stronger fit when the business needs to print:
- Larger signs
- Equipment panels
- Multiple product blanks
- Metal artwork
- Short production batches
- Mixed white and varnish effects
The larger bed only improves productivity when the workflow also includes accurate positioning, efficient loading and a repeatable material test process.

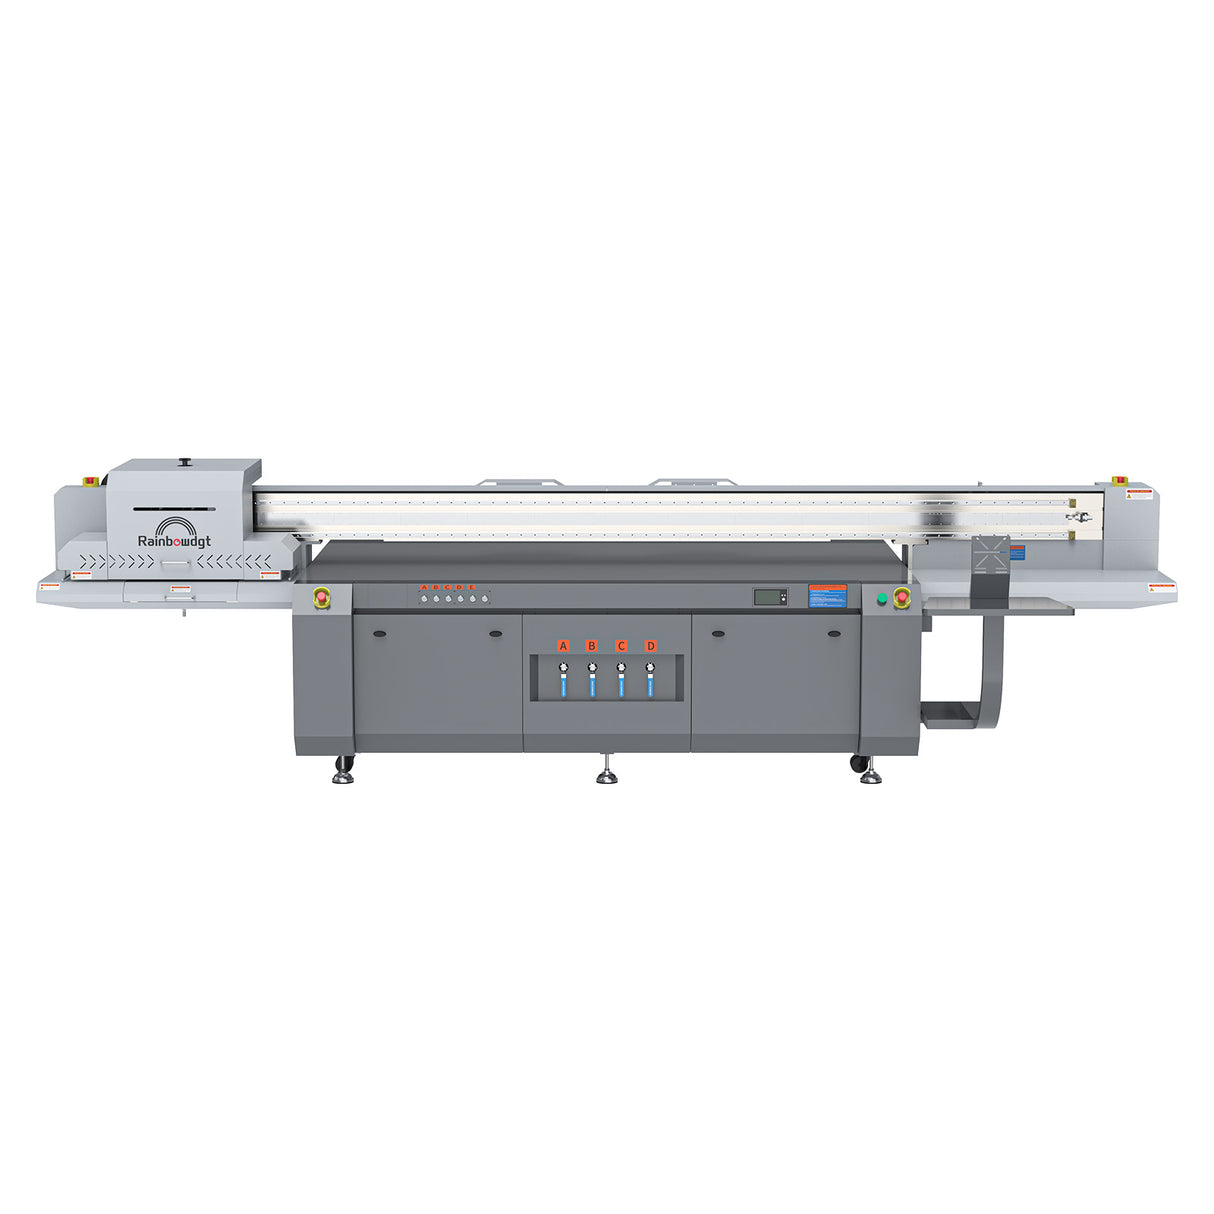
Nano-2513 for industrial metal sheets
The Nano-2513 provides a 2.5 × 1.3 m print area, CMYK plus white and varnish configurations, and a vacuum suction table. Its format is designed for large sheets and industrial flatbed production rather than desktop customization.
Typical applications include:
- Large metal signs
- Architectural panels
- Industrial covers
- Multiple panel layouts
- Large decorative sheets
- Production-scale rigid substrates
A large-format machine should be selected only after checking floor space, power, ventilation, material handling and the method used to load heavy sheets safely.
Questions to ask before purchasing
Before choosing a UV printer for metal, confirm:
- What is the largest product that will be printed regularly?
- Are the products flat, cylindrical or irregular?
- Is white ink needed for dark metal?
- Is spot varnish or raised texture part of the product offer?
- Does the printer support a compatible primer workflow?
- How many items must be completed per day?
- Will custom positioning fixtures be required?
- What adhesion and durability tests must the finished product pass?
- Who will provide ink, parts, training and technical support?
- Can the supplier test the customer’s actual metal samples before purchase?
A convincing sample printed on generic aluminum is not enough. The most valuable test uses the same metal, coating and production design that the business intends to sell.
Conclusion
UV printing on metal makes full-color customization, white ink, variable data and raised varnish possible without screens or transfer paper. The key to a durable result is identifying the actual surface, removing contamination, testing primer where needed and approving the print under realistic use conditions. Printer selection should follow product size, daily volume and finishing requirements—not resolution claims alone.
Frequently Asked Questions
Can a UV printer print directly on metal?
Yes. UV printers can print on many bare, painted, powder-coated and anodized metal surfaces. Direct printing does not guarantee sufficient adhesion, however. The exact finish should be cleaned, printed and tested before production.
Does metal need primer before UV printing?
Some metals and coatings print successfully without primer, while others require an adhesion promoter. Primer is more likely to be needed on smooth bare aluminum, stainless steel and other difficult inorganic surfaces. Test primed and unprimed samples before deciding.
Can UV printing be used on stainless steel?
Yes, but stainless steel must be free from fingerprints, oil, polishing compounds and processing residue. Smooth stainless surfaces may require primer or another surface treatment to achieve acceptable adhesion.
Can a UV printer print on aluminum?
Yes. Coated, anodized and bare aluminum can all be UV printed, but they may require different preparation. The coating or anodized finish often has a greater effect on adhesion than the aluminum alloy itself.
How durable is UV printing on metal?
Durability depends on the ink, primer, metal finish, curing, handling and exposure conditions. A print intended for an indoor plaque faces different demands from an outdoor sign or a control panel cleaned with chemicals. Test according to the actual application.
Is UV printing better than laser engraving for metal?
UV printing is generally better for full color, photographs, white ink and decorative effects. Laser engraving is usually better when a permanent mark must be created in the metal surface itself. Some products use both processes.
Can UV varnish create raised effects on metal?
Yes. Multiple clear or white ink layers can create tactile lettering and embossed-looking patterns. The height and durability depend on the printer, ink configuration, artwork and number of layers.
Should metal be cut before or after UV printing?
Where possible, complete cutting, drilling, bending and forming before printing. Mechanical processing after printing may chip, crack or scratch the cured ink, especially near edges and fold lines.
Can UV printing be used for outdoor metal signs?
It can, but outdoor suitability must be validated for the complete system: metal coating, primer, ink, varnish and exposure conditions. A successful indoor adhesion test does not by itself establish outdoor durability.
